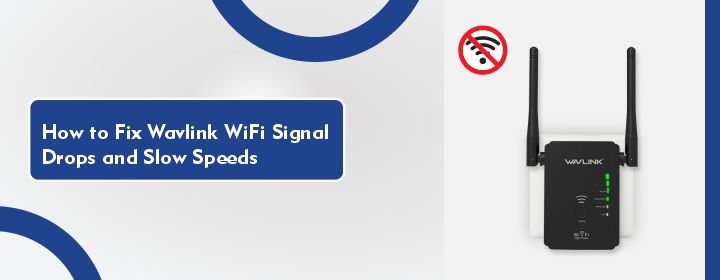
How to Fix Wavlink WiFi Signal Drops and Slow Speeds
Usually, slow speeds and Wavlink WiFi signal failures is a result of various issues such as bad device location, improper configuration, interference, or overcrowded bandwidth. When many devices are online and your connection stops down during essential tasks or crawls when too many devices are connected, majorly the problem is fixable and is not that difficult to fix.
The trouble is just that many people lack knowledge about where to search and what to change. Emphasizing the setup process, optimizing settings, and making a few clever changes to your home network environment, this guide teaches you precisely how to fix Wavlink WiFi performance difficulties. Let’s begin!
Understanding the Problem: Why Is Your Wavlink WiFi not working properly?
Understanding what could be originally generating these problems can help you address repairs in a better way. Some of the problems that may lead to slow speeds and weak WiFi are:
- Poor router placement (yes, that matters more than you’d think)
- Firmware that’s outdated
- Interference from other devices or networks
- Too many connected devices choking your bandwidth
- Misconfigured setup parameters
If you use a Wavlink range extender or router, sometimes the issue may not be the device itself—it might just be the surroundings it runs in or how it was setup initially.
Step-by-Step Fixes to Restore Your Wavlink WiFi Performance
1. Reposition Your Router or Extender
One of the most overlooked aspects of any Wavlink setup is placement. Your router or range extender won’t be able to help you if it is placed behind furniture, inside a cabinet, or in a corner of your house.
Place it at center, at an eye level area away from walls, telephones, microwaves, or big appliances. You’ll be amazed how much that alone can boost your signal strength.
2. Update Your Firmware
Technology gets better over time—but only if you let it. One of the most common causes of poor performance is outdated firmware. Most users skip firmware updates during the setup process, and that’s a mistake.
Check the firmware version on your Wavlink dashboard, then upgrade it if needed. Frequent firmware is released by the manufacturers resolve security flaws, bug issues, and also boost signal performance.
3. Eliminate Interference
Your Wavlink device is transmitting the signals with more than just your devices. Baby monitors, cordless phones, Bluetooth speakers—these can all interfere with your signal. If your home is packed with electronics, your WiFi might face problems in the connection.
Try switching the channel your router broadcasts on. The Wavlink’s dashboard allows you to manually change the channel under advanced wireless settings.
4. Reduce Device Overload
Let’s be honest, we’ve all got a ton of devices connected to WiFi: phones, laptops, smart TVs, smart thermostats, even fridges these days. If you’ve got 20+ devices connected and all competing for bandwidth, your Wavlink network might not work for too long.
Go into your admin dashboard and kick off any unnecessary devices. You can also enable Quality of Service (QoS) settings through your login menu to prioritize traffic—for example, giving video calls or streaming more bandwidth than email or background downloads.
5. Reset and Reconfigure
It may be time for a reset if you have tried everything and your Wavlink WiFi still seems slow or erratic. Generally, after months of instability or change, a complete reset may revitalize your network.
Holding the reset button on your router for about ten seconds will cause it to restart. Then go through the Wavlink setup process from scratch. Set a strong password, choose an optimal channel, and make sure both 2.4GHz and 5GHz bands are active.
6. Extend Your Network the Right Way
If you live in a larger home, your issue might not be with the router—it could be that your signal just can’t reach every corner. In that case, a mesh network or a proper Wavlink extender setup is key.
Set up your extender a bit close to the primary router. So that, it is able to capture a strong signal in order to be rebroadcasted with efficiency. Too many people place their extender in the “dead zone,” which completely defeats the purpose.
Conclusion: Smooth Sailing Ahead
Nobody wants to deal with slow WiFi, especially when you’ve invested in a Wavlink setup that should be handling your needs with ease. The good news is, with a few simple adjustments—better placement, a firmware update, reduced interference, and maybe a reconfiguration—you can get your speeds up and eliminate those annoying signal drops.
Technology isn’t perfect, but it’s definitely fixable. Therefore before you replace your setup, try these techniques and relish a stronger, more steady connection that works for you whenever you need it.
FAQs
Why does my Wavlink WiFi connection drop on irregular intervals?
Common causes of signal dropouts include obsolete firmware, inadequate location, or interference from other devices. You can start with updating the firmware after checking your Wavlink’s location.
Can a Wavlink extender slow down my internet speed?
Yes, if it’s placed too far from the router or in a dead zone. Proper Wavlink setup requires the extender to be within a good range of the main router.
How do I access my Wavlink dashboard?
Open a browser and type the default IP i-e “192.168.10.1”. From there, log in and implement settings, firmware upgrade, or device reset.
Should I use both 2.4GHz and 5GHz bands on my Wavlink router?
Absolutely, while 5GHz is faster across limited areas, 2.4GHz spans greater distances. For best performance, a Wavlink system is balanced using both.
How often should I reset my Wavlink router?
Not regularly, but if you’re experiencing frequent issues or after a major firmware update, a reset followed by a fresh Wavlink setup can help.
Is it necessary to update Wavlink firmware?
Yes! Updates often include fixes for performance bugs and connectivity issues. Make it a habit to check for updates via your Wavlink setup page every few months.
