How to Set Up a Wavlink Outdoor WiFi Extender (Any Model)
Yes — you can set up a Wavlink outdoor WiFi extender on your own, without calling tech support or decoding a user manual that reads like alien math. Whether it’s the AX1800, AC1200, or that round-cased little beast you just unboxed, the setup process is pretty much the same — and yes, it works.
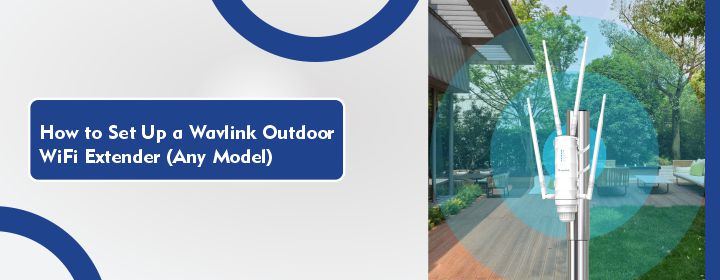
You ever stand in your backyard, phone in hand, waving it around like you’re trying to catch a signal from space? It’s annoying. The bars drop, the video buffers, and suddenly you’re stuck walking back inside just to send a text. That’s exactly what the Wavlink extender is built to fix — stretch your WiFi outdoors where it actually matters.
If your patio, garage, or garden feels like a no-signal zone, don’t worry — you’re about five minutes away from solving that. Let’s walk through it together.
Step 1: Unbox and Get Familiar with Your Device
First things first—take a minute to actually look at the device. Wavlink makes several models (AC600, AC1200, AC2100, etc.), but most outdoor versions follow the same setup process.
In your box, you’ll find:
- The extender itself (usually shaped like a cylinder or router-style box)
- A power adapter or PoE injector
- Mounting equipment
- An ethernet cable
- A user manual
Now, locate the label on the device—it usually has the default SSID, login IP (often 192.168.10.1), and default credentials. You’ll need those in a bit.
Step 2: Decide Where to Mount It
This is crucial. Your Wavlink setup will only be as good as your placement.
Mount it where it receives a decent signal from your main router and broadcasts the extended WiFi signals to your dead zone.
Tips for perfect placement:
- Avoid thick walls and metal barriers
- Mount it at least 6-10 feet off the ground
(Don’t worry if there is any shed over the extender or not, as outdoor extenders are fully waterproof and constructed in a way to bear the harsh weather conditions).
No access to power outdoors? Use the PoE injector—this sends both power and internet through a single ethernet cable.
Step 3: Connect to Power and Boot It Up
Go ahead and plug in your extender.
If you’re using a PoE setup:
- Connect the ethernet from the extender to the “PoE” port on the injector.
- Run another ethernet cable from your router to the “LAN” port on the injector.
- Plug the injector into the wall.
If it’s just a power adapter, connect it directly to the outlet.
Give it a minute or two. You’ll see LED lights blinking—usually Power, LAN, and WiFi indicators.
Step 4: Connect to the Wavlink Extender’s Network
Now find Wavlink’s SSID from WiFi settings on your PC/smartphone or laptop. The WiFi name can seem to match these: “WAVLINK-N” or “WAVLINK-5G”.
Connect your device to it.
At this point, you’ll see no internet—that’s normal. You’re just connecting to the device’s internal system so you can configure it.
Once your device gets connected, type the IP address: “192.168.10.1” in the address bar of your browser.
Now, you’ll reach the login screen
The default credentials are usually:
- Username: admin
- Password: admin (If that doesn’t work, check the sticker or manual, accurate details are mentioned on the device’s label.)
Step 5: Go Through the Wavlink Setup Wizard
Once logged in, you’ll reach the admin dashboard. Now, you’ve to follow the on-screen instructions to configure your extender.
Here’s what you’ve to do:
- Choose “Repeater” or “Extender” mode.
- The extender will scan for available WiFi networks.
- Select your home WiFi network from the list.
- Enter your home WiFi password.
- Choose whether to keep the default extended SSID (e.g., “WAVLINK_EXT”) or rename it.
Click “Apply” and let it reboot. This might take a couple of minutes—don’t unplug anything.
Step 6: Test the Connection
Once the extender reboots, reconnect your phone or laptop to the new extended network.
Try loading a website. If everything was set up correctly, it should work just like your regular WiFi.
Still not working? Double-check:
- Did you enter the right WiFi password?
- Is the extender placed too far from your router?
- Are the lights indicating a signal connection?
If required, log back in at 192.168.10.1 and go through the wizard again.
Step 7: Secure and Finalize Installation
Now that your Wavlink setup is complete, go mount it in its permanent spot (if you haven’t already). Use the included mounting gear—usually brackets or screws—to secure it to a wall, pole, or under an eave.
Important:
- Make sure the ethernet or power cable is weather-protected.
- Point external antennas (if present) outward and upward for best signal spread.
- Avoid direct sun exposure if possible. Even though most Wavlink models are weatherproof, too much heat can still reduce lifespan.
Additional Tips for Ongoing Performance
- Change the login credentials from the default to something secure.
- Update firmware every few months via the admin panel. Wavlink posts updates on their official site.
- Reboot the device occasionally to keep it running smoothly—once every few weeks is fine.
- If your signal drops often, switch to a less crowded WiFi channel from the settings.
Common Questions Answered
Can I use multiple Wavlink extenders?
Yes—but place them out in such a way, so each one gets a strong signal from the main router or the previous extender. Don’t add more than two, else you’ll see performance drops.
How far can a Wavlink outdoor extender reach?
Depending on the model and conditions, it can reach up to 300 to 500 feet in open space. Trees, walls, and interference can reduce that.
Does it support dual-band?
Most modern models (like AC1200 or above) support both 2.4GHz and 5GHz. Use 2.4GHz for longer range; use 5GHz for faster speeds.
Do I need WiFi to set it up?
Not at first. You just need to connect to the extender’s network to set it up—no internet required until you link it to your router.
Why is the signal strong but internet slow?
That means the extender is close to you, but too far from the router. Move it closer to the router for a better speed.
Final Thoughts: A Setup That Actually Works
If you’ve followed the steps above, your Wavlink setup should be good to go—and your backyard, workshop, or patio should now have a reliable WiFi connection. These extenders are built to perform in tough conditions, but like any tech, they do best when properly installed and maintained.
Don’t overcomplicate it. Keep your placement smart, follow the setup wizard carefully, and give it a reboot once in a while.
Still struggling? Feel free to reach out to us at our toll-free support. But for most users, we believe, this simple process will do the trick.
