The Wavlink brand is one of the most used networking device organization. The AC1200 WiFi speed extender is the most purchased of all. Have a look how to complete the Wavlink AC1200 setup in home, but first learn some information about it.
The Device is pretty small that you can plug in directly in any power outlet. There are buttons, a port, and LED light which indicates status of the device. The device content package didn’t contain the power cord, Ethernet cable, or any other than extender, and a user manual.
There are ultimate and a lot of features that provide user seamless internet connectivity and extended network coverage. There is frequency adjustments (2.4 GHz and 5 GHz) option, Wavlink app provide so many features and easy to analyse GUI interface window.
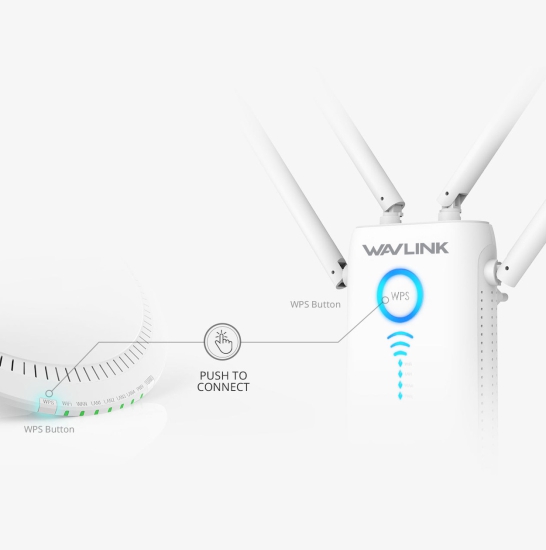
The connection usually connects and setup with the help of WPS methods. But, you can also connect it with Ethernet cable. We will describe both the methods:
Then, there is no need to adjust any settings, because the extender will set automatically in default settings.
The Wavlink AC1200 extender default IP address is 192.168.10.1 and you can reach to the interface login page. One more way that is URL (wifi.wavlink.com or Ap.setup) of the extender will take you to the Wavlink setup page.
Here, you can easily adjust the frequency, create new network, change WiFi address and password and password.
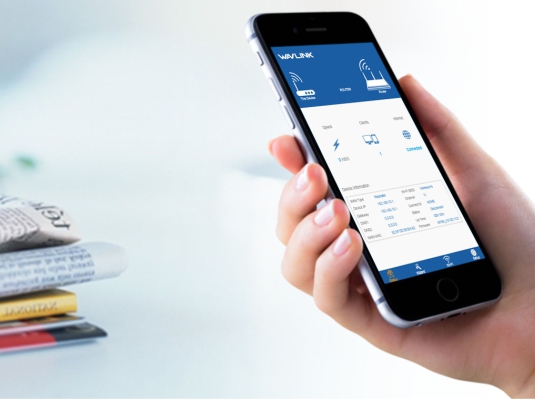
The other method to setup the extender is via phone using the Wavlink app. This application is available on the Play Store, App Store, Microsoft Store and official site of the Wavlink brand.
From here, you can complete the Wavlink AC1200 setup easily. Now, you must adjust some of the settings:
Access the interface of extender through your phone or computer via IP address or URL or app using the username and password. In the dashboard, click on the Settings > Open Wireless Networks Setting > choose the SSID option > add new password and username > apply the changes by click on SAVE.
Access the interface of extender through your phone or computer via IP address or URL or app using the username and password. In the dashboard, click on the Settings > Open Wireless Networks Setting > select Channels option > here choose 2.4 GHz or 5 GHz according to the area. Then, you must fill all fields and SAVE the changes.
Access the interface of extender through your phone or computer via IP address or URL or app using the username and password. In the dashboard, click on the Settings > Admin window > enter new credentials (username and password). Then, SAVE the changes that you have made.
If in any situation user need to refresh the extender and network, you can do it with the help of the simple steps.
Here, you have learned all information about the Wavlink AC1200 setup (extender), and how to configure its settings.
